Showing posts with label This and That. Show all posts

Tuesday, October 30, 2012

Halloween Crafts 2012

Here are some of the fun little Halloween crafts J did this year! Most of these she did at school so I can't really take credit but I thought I would share anyway for those of you who might want to recreate the cuteness!


J colored her pumpkin with markers one day and added the "Happy Halloween" letters another. 

The cat was made in a bowl with dried black beans and lots of glue! Add the googly eyes, pom nose, pipe cleaner whiskers and scrap paper ears and you have yourself one cute little black cat! Oh, and, can't forget about the glitter!

The balloon pumpkin was covered with paper and starch water, painted orange and a paper face was added last. 

I found the foam Halloween cutouts and stickers at the dollar store. It worked out great for working on letters and sounds!

The pumpkin is made of orange dyed rice with a black bean face and a artificial leaf and pipe cleaner for embellishment. Again... lots of glue!

The paper crafts is simple enough... gluing spooky scrapbook paper shapes onto paper but I thought the footprint ghost was a nice touch!

And that was our October of crafts in a nutshell! Hope you found some good ideas to share with your kiddos! Happy Halloween!!!

Friday, October 12, 2012

J's Pink & Blue Airplane Party

Thanks for stopping by and checking out J's Pink & Blue Airplane Party! My little girl loves pink and loves airplanes so the theme was an easy choice. Since airplane party are more of a boy thing, everything I was finding was red and blue so I had to make a lot of the labels and things myself. Here are some of the details including links to inspiration and where to buy. Enjoy!!!

For the gift bags, I made these adorable candy airplanes out of tootsie rolls, a stick of gum (wrapped in scrapbook paper) and two lifesavers for wheels. I bought the individually wrapped lifesavers, poked a hole in the sides and threaded the rubberband through the middle so they weren't completely unwrapped. 
Then, I bagged, threw in some skittles and added some ribbon!
I put two glowstick bracelets in pretzel bags and made labels that said "Airplane Flares." I also had a foam airplane in each bag!
This runway table cloth was SO easy to make! All it took was one dollar store plastic table cloth and a roll of white Duct Tape. I taped the table cloth down with painters tape and had my hubby hold one roll of tape as I held the other. Then, I cut small strips for the dashes. Done!
I didn't find anything I liked for J to wear so I decided to make something! I found this plain t-shirt at Target for $2.50, added the "jewelry" embellishments with some fabric paint using a pencil eraser for the big beads and the back of a wooden skewer for the smaller beads. Anything works really, just see what you have around the house! Finished it off with some pretty ribbon bows and you have an adorable, one of a kind T!!!

I made these cupcake toppers on Picmonkey and I love them!!! One says "Happy Birthday J", the second is a pink plane and the third says "J" in pink over a large blue 3! I found some matching pink scrapbook paper and used a large hole punch to frame it. Put a thin popsicle stick in between the two papers and glue!
The birthday girl demolishing her cake! Actually, just the icing. =)
 Here is the big picture! A few other details: I used these blue cloud balloons and blue airplane balloons. We also had individual bubble containers on each table as out party activity. 

J loved her airplane party and I hope you did too!!! In fact... J keeps asking when her next party is! Lol!

Wednesday, September 5, 2012

Football Taggie Blanket

Ever since we found out that we are having a little boy I have had all things boy on the brain! I finally finished my first project for the little man and just in time for football season! I've been determined to make him a football blanket and since my husband is a Notre Dame fan and I am a Navy fan I added blue and gold taggies for us both! 


What You Need
*Brown bumpy fabric (1 yard)
*Soft white fabric (1/4 yard)
*fabric glue
*ribbons
*thread

First thing I did was fold the fabric in half and sew a line along the inside for my first seam. No cutting!

Then I folded the blanket corners under to make a decent football shape.

I traced my football shaped and folded into fours so I could trim and make all sides even


I cut 2in strips of my white fabric and used fabric glue to pinch the edges together and form a center line down the under side of the fabric


I used my form as a guide to place my white fabric, pinned it in place and sewed it down.


Now, here comes the fun creative part I am really excited about! I wanted to flatten out the bumps outside of the football outline so I simply ironed them out leaving a bumpy football and a flat exterior. Be careful not to iron out the bumps on the backside of your fabric though! Also, don't let your fabric get too hot or it could discolor. Iron a few swipes, let cool and go again until flat.

Cut 6 in ribbons, use fabric glue to make them into 3 in loops and space evenly on fabric. 


The finished result isn't perfect but I really love it and hope you do too!!!


Sunday, March 4, 2012

Week Nine: Fabric Cupcake Keychain

So, last week I made a key chain from another tutorial and, well, I kinda botched it. My fault for not following directions at some points and being lazy at other. Anyway, I decided I just couldn't go out like that so this week I am not only making another key chain but coming up with my own tutorial as well! Haha!!! Take that key chain! Ahem.

After last weeks key chain mishap I decided I needed something with a little more personality. I saw this really cute stuffed fabric strawberry and thought... hey, I can do that. I just so happen to be a lover of all things sweet and that is when the cupcake key chain was born. I also had perfect fabric for it already from another project so yay for no trip to the store! Hope you like it!


What You Need
*3 fabrics (I used felt for the tan cake and the rest is cotton)
*Red pom, button, another fabric for cherry
*Filler (just so happens my daughter broke into one of her pillows and pulled all the filler out the other day. Guess she knew I would need some.)
*Key ring
*Double sided iron on interface
*Typical sewing hoohah (scissors, thread, needle)

And we're off to make some calorie free cupcakes...

Base fabric dimensions: 4 1/2 in x 2 1/2 in for the side and the circle was 1 1/2 in around.
Place the base side with the right sides together and sew like so...
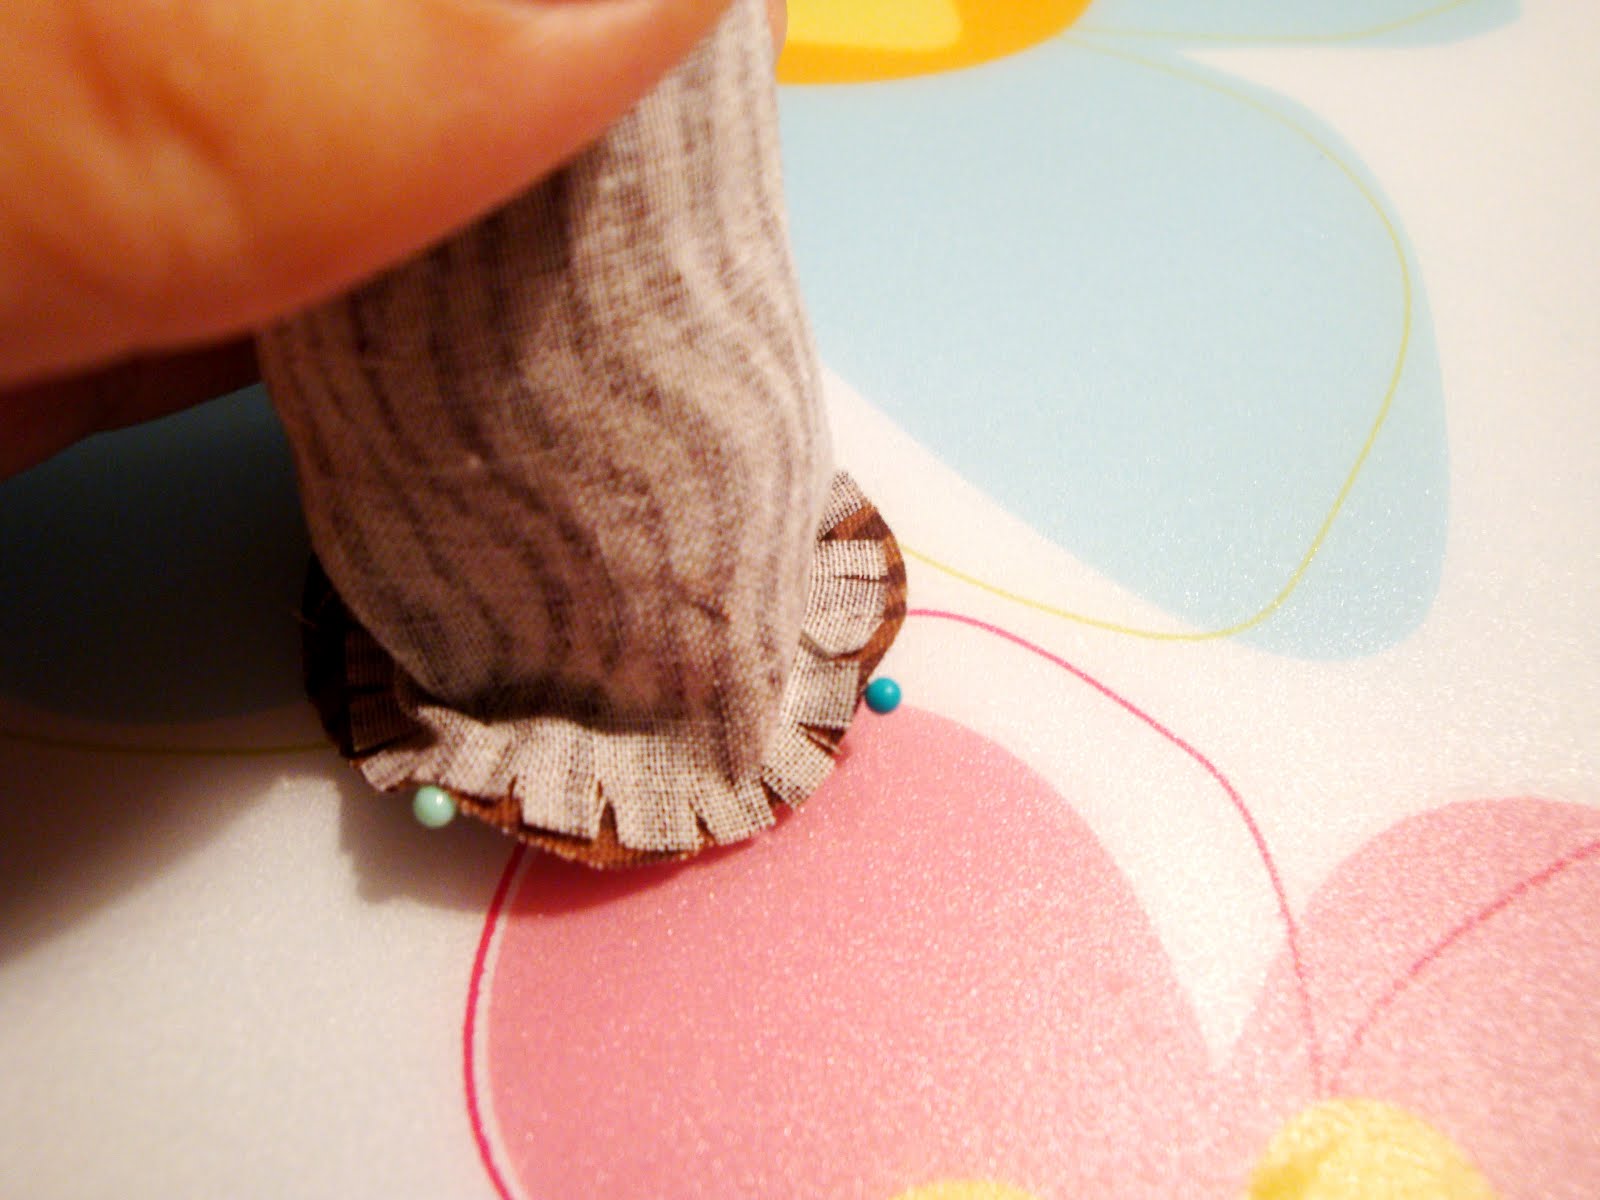
Now, attaching the circle is tricky so hang in there! I found the tutorial at Sew Mama Sew, so if I lose you feel free to check out her more detailed description.
Cut little slits around the edge that will attach to the round base.
I filled my base temporarily to make it easier to pin the circular bottom on.
Pin your circle on with 4 pins.
Remove filling and sew around the edges ABOVE the slits. You don't want holes in your cupcake!
Should look like this...
And this...
Turn inside to check and... hey, there! Looks round to me!
Phew! Moving on... cut your cake top approximately the size of a Guiness glass. For those of you who don't have a Guiness glass... shame on you. Just kidding. Cut a circle about 3 1/4 inches around.
Put a row of basting stiches around the edges of your cake top, pull and gather.
Place your icing on a double sided fusible web. Cut to size.
Iron on the frosting and sew on the pom cherry
Sew or fuse together your keychain strap... does this look like bacon to anyone else? I must be hungry.
Place the felt top inside the base so the right sides are together
Hand sew three quarters of the cupcake leaving enough space to turn it right side out
Hand sew the remainder adding the bacon... I mean key chain loop.
There. Now you have a sugary treat look-a-like to taunt you everywhere you go.

Saturday, February 11, 2012

Week Six: Clothespin Chip Clips

I went back and forth about my would-be craft of the week and just could not make up my mind! But, while scouring Pinterest for inspiration, I kept running across crafts with clothespins. I have about 40 clothes pins left from last weeks Valentine, since HEB only sells them in bulk, so why not use what I have?

Here is a super simple DIY to make decorative chip clips! Somehow chips make me think of football and I just so happened to have some left over football scrap paper. Nice! So, all you need is some modge podge, scrap paper, a brush and clothespins and you can say goodbye to those stale chips... if you can get your husband to use them too. =)

Simply traced a rough outline and cut it out...
Apply a layer of modge podge to the clothes pin and affix paper
Trim any rough edges and then cover with another layer of modge podge. If the paper bubbles, you didn't put enough modge podge on the clothespin to start with so peel back and apply more.
I love fishes cuz their so delicious... when they're not stale.
Now, what to do with the other 36 pins I have left? Lol!

Sunday, January 29, 2012

Week Four: Barbie Gets A New Dress

My daughter's favorite toy is her Barbie. If you look really closely you'll notice her hair is more nasty dread locks than silky smooth tresses... but the love of a two year old has no bounds. I try to brush it out occassionally but J screams. Dread locks it is then.

I figured that since barbie only has one outfit I would make her another so J could play dress up with her. I found this cute cupcake shirt below with matching polka dot tights for Jordan's birthday back in September. Since we live in Texas, and it was still quite hot here, I removed the polka dot sleeves and saved them "just in case." Well, just so happens I found a use for one of them this week!

Since I already had a hem from the sleeve I left that in tact as the bottom of the dress.
My fabric was a stretchy material so no need to worry about adding velcro in the back. Just pin in the desired shape...
Sew along the pins...

and trim the edges. I simply folded over the excess on top and used fabric glue to hem.
Turn inside out and KA-POW! Barbie has a new dress!!! And it slips on and off nice and easy, perfect for a toddler at play!
That was too easy I had to make her an accessory to go. I had some left over fabric from a belt buckle I made for J when she was a cowgirl for Halloween...
and now barbie has a belt!
Now if only the other sleeve was big enough to make one in my size!
And after all my hard work, you know what the best part was? J absolutely... hated it! Haha! Bet you thought I was going to say she loved it, huh? Nope she cried, tore it off and screamed until I put Barbie's old dress back on. An oldie but a goodie I guess. Oh well, better luck next week Mommy. =)