Tuesday, August 13, 2013

How to Print Your Pins

I don't know about you but I.... am..... a.... Pinterest.... Addict. There it is... I said it. I have spent many, many, many hours collecting things on Pinterest. And what do I have to show for it? PINS! But what happens if for some reasons those pins disappear or something happens to my account? What will happen to the fruits of my hoarding labors? I'd really rather not find out. Ya hear me?

So this week, I have a little tutorial on how to save your pins on PicMonkey. If you are a planner like me you have already started thinking about Fall, so here is the first set of pictures I put together with my Halloween collection. 


Head on over to PicMonkey and click on Create a Collage. 

Click on the picture on the far left that says "Layouts" when you hover over it. Choose the category "Square Deal" and choose the amount of squares you want... I used the third options which has 16 squares. 

Under your collage it shows the dimensions 1024 x 1024. Click on the little lock button so that when you hover over it it says "Lock Proportions." This will allow you to change the proportions and make your picture 8 x 10 for printing. Change the proportions to 1920 x 2400.

Go back to the far left options and click on the picture you hover over that says "Images" and then click on "Open Photos". 

Upload the pictures you have selected from Pinterest. (I previously right clicked on the pins I wanted to save, clicked "Save to My Computer" and then saved them all in a common folder.)

If you want to add any words to your collage now is the time to click on "Edit". Just make sure you have the pictures exactly the way you want them because you won't be able to go back and change them once you enter the Editing section. 

Save to your computer and print that puppy out!

Hope that helps and Happy Pinning!!!

Friday, August 2, 2013

Honey Bee Baby Shower

The Honey Bee Baby Shower is a perfect theme for any Mama to Bee!  It's gender neutral, yet still colorful and fun! Just mix up some black and yellow napkins, plates and cups and you've got yourself some Honey Bee action!


 I made a cute (yet practical... hello diapers!) little Bee diaper cake that I LOVED! I found this yellow hexagonal ribbon which was perfect and the mini bee pillow pet will be just right once baby is ready for a toddler pillow! You could also go with some Burt's Bees Baby Shampoo and Bubble Bath but I went with the old standby, Johnson and Johnson.

 For a game we played Guess-How-Many-Honeycombs-are-in-the-Baby-Bottle. And for the few kids that tagged along for the party, I made a little snack bag of Honeycombs & Bees (M&M's). 

Now onto the super fun honey themed menu!!! I'm not gonna lie, I had a really fantastic time looking at honey laden foods and could have made much, much more... but I managed to rein in my inner over-doer and went for a more appropriate sized spread. =)

First, and my favorite, was the Honey Buttercream Frosting on the cupcakes!!! OMG! I wanted to lick each and every one of them... but don't worry, I didn't. This recipe is a MUST!


Secondly, I made a version of a great Fruit Salad with Honey Dressing from Food Network, compliments of Paula Deen. I wasn't so keen on the idea of using ALL fruit (I thought that might be too sweet) so here is my version of the recipe which received thumbs up all around!

1/3 cup honey
1/4 cup orange juice
1/4 cup canola oil
1/2 tsp fresh lemon juice
3/4 tsp poppy seeds
1/4 tsp salt
1/2 tsp dijon mustard
Romaine lettuce
Diced apples (I used Gala)
Mandarin oranges
Craisins
Candied pecans

Finally, we had some simple Honey Ham and Cheese Croissants but these Honey Ham Biscuits Sliders and Honey Prosciutto Flatbreads look like pretty amazing alternatives!!!

Hope you have fun party planning! I'm more than happy to bee of service! =)

Monday, June 24, 2013

30 Beers for 30 Years Birthday Gift Sampler

It's been a few months since my husbands big 30th birthday but I finally got around to blogging about it. As most of you have probably discovered, gift giving for guys can be tough! No they don't want ties... or socks... or really anything from the stores I like shopping at! My guy loves gadgets and computer stuff but I don't speak geek. For instance, the one time I tried to buy a computer game for my dad who likes "Fantasy" type games... I accidentally got him a kids game. I guess I don't know how to tell the difference between adult games with elves and kids games with elves. Lol!

But beer. Beer is always a win in our house! So if your guy is like mine then consider making him a beer sampler with the number of beers to match the number of birthdays! We have a store called Specs that sells individual beers so I came up with the idea of 30 Beers for 30 Years! I was pretty proud of myself... if you can't tell. And if you would like to avoid your kitchen counter being taken over by the beer rating system, go ahead and type up a spreadsheet or download a beer app on his phone so your guy can rate them and remember which ones he liked. That's part of the fun!


The Sampler idea could translate to an easy gift idea for any member of the family too. Have a mom that likes tea and coffee? Give her a sampler of exotic tea bags or k-cups if you have a Tassimo coffee machine. Does your dad like gardening? You could give a Seed Sampler to the green thumb in your family. Samplers are fun! And they're a gift that keeps on giving!

Tuesday, February 12, 2013

Heart Glow Valentine

Valentine's Day is upon us and, I don't know about you, but I can never seem to bring myself to buying pre-made Valentine's from the store. I'm sure J would be perfectly happy giving out Disney Princess cards to her little friends but... Mommy just can't help herself. I found this cute Valentine on Pinterest, and, while it was printable, I couldn't edit it and add J's name. Off to PicMonkey.com I went and I'm really happy with the way it turned out! 


Since, I'm pretty sure I'm not the only person out there who would like a personalized Valentine I thought I would save you some work and give you a quick and easy tutorial! So, head on over to www.picmonkey.com and make one already!!!

What You Need
* Cardstock
*Printer
*Hole Punch
*Glowsticks (15 for $1 from Target)

First thing I did was open paint and create a blank canvas of the right size. Once you are in paint open Properties change the units to inches and input the Width as 5.5 and the Height as 1.5. Now save it somewhere where you can find it! Lol!

Click edit your photo and open your page. Click on the P on the far left which will take you to fonts. Type in the words in these sizes, fonts and colors: 

Valentine- D90700 Sacramento 48
you make my- Shadows into Light Two 22
Heart Glow- Budmo Jiggler 50
Happy Vday- Shadows into Light Two 18 

Click on the picture of the Heart with the arrow through it below the P, click on Sweathearts, click on banners, choose one and enlarge it to fill the entire page. This is how I made the background pink. There is probably an easier way... but that's what I did. You can do the background in any color you like but here is the color pink I used: FFCDE1.

Thanks for stopping by my blog and... Happy Valentine's Day!!!

Sunday, January 27, 2013

Burp Cloths and Fabric Block


Baby C was born in November and between going from parent of one to parent of two, plus throw in some holidays and having family in town, I haven't posted in a while. But... I have completed a few projects here and there. A good friend of mine had her baby boy just a month before me and I was able to throw a little something together for her before popping myself! 

Burp cloths are just about the most simple thing you could possibly make and one that absolutely gets used! There are a lot of burp cloth tutorials out there in blogland so I won't bore you with another one... but you can click on the link to view the tutorial I used. I also made a fabric block out of the same fabrics with a felt letter M for Max! 


Tuesday, October 30, 2012

Halloween Crafts 2012

Here are some of the fun little Halloween crafts J did this year! Most of these she did at school so I can't really take credit but I thought I would share anyway for those of you who might want to recreate the cuteness!


J colored her pumpkin with markers one day and added the "Happy Halloween" letters another. 

The cat was made in a bowl with dried black beans and lots of glue! Add the googly eyes, pom nose, pipe cleaner whiskers and scrap paper ears and you have yourself one cute little black cat! Oh, and, can't forget about the glitter!

The balloon pumpkin was covered with paper and starch water, painted orange and a paper face was added last. 

I found the foam Halloween cutouts and stickers at the dollar store. It worked out great for working on letters and sounds!

The pumpkin is made of orange dyed rice with a black bean face and a artificial leaf and pipe cleaner for embellishment. Again... lots of glue!

The paper crafts is simple enough... gluing spooky scrapbook paper shapes onto paper but I thought the footprint ghost was a nice touch!

And that was our October of crafts in a nutshell! Hope you found some good ideas to share with your kiddos! Happy Halloween!!!

Friday, October 12, 2012

J's Pink & Blue Airplane Party

Thanks for stopping by and checking out J's Pink & Blue Airplane Party! My little girl loves pink and loves airplanes so the theme was an easy choice. Since airplane party are more of a boy thing, everything I was finding was red and blue so I had to make a lot of the labels and things myself. Here are some of the details including links to inspiration and where to buy. Enjoy!!!

For the gift bags, I made these adorable candy airplanes out of tootsie rolls, a stick of gum (wrapped in scrapbook paper) and two lifesavers for wheels. I bought the individually wrapped lifesavers, poked a hole in the sides and threaded the rubberband through the middle so they weren't completely unwrapped. 
Then, I bagged, threw in some skittles and added some ribbon!
I put two glowstick bracelets in pretzel bags and made labels that said "Airplane Flares." I also had a foam airplane in each bag!
This runway table cloth was SO easy to make! All it took was one dollar store plastic table cloth and a roll of white Duct Tape. I taped the table cloth down with painters tape and had my hubby hold one roll of tape as I held the other. Then, I cut small strips for the dashes. Done!
I didn't find anything I liked for J to wear so I decided to make something! I found this plain t-shirt at Target for $2.50, added the "jewelry" embellishments with some fabric paint using a pencil eraser for the big beads and the back of a wooden skewer for the smaller beads. Anything works really, just see what you have around the house! Finished it off with some pretty ribbon bows and you have an adorable, one of a kind T!!!

I made these cupcake toppers on Picmonkey and I love them!!! One says "Happy Birthday J", the second is a pink plane and the third says "J" in pink over a large blue 3! I found some matching pink scrapbook paper and used a large hole punch to frame it. Put a thin popsicle stick in between the two papers and glue!
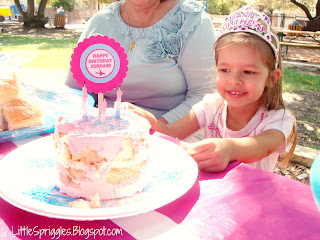
The birthday girl demolishing her cake! Actually, just the icing. =)
 Here is the big picture! A few other details: I used these blue cloud balloons and blue airplane balloons. We also had individual bubble containers on each table as out party activity. 

J loved her airplane party and I hope you did too!!! In fact... J keeps asking when her next party is! Lol!